

An API is an application programming interface. It’s like the brainstem of a computer or the nervous system of a human. The API is where all communication between software components flows through, and it makes up the connective tissue that connects all of your products and services together. That’s why APIs are incredibly important to understand if you want to build out a consistent user experience across your business. In this article, we’ll talk about how to create an effective API at every stage — from initial development through ongoing maintenance and troubleshooting — so that you can make sure they’re always working at their best for your customers’ (and users’) benefit and satisfaction!
Understanding The Basics Of APIs

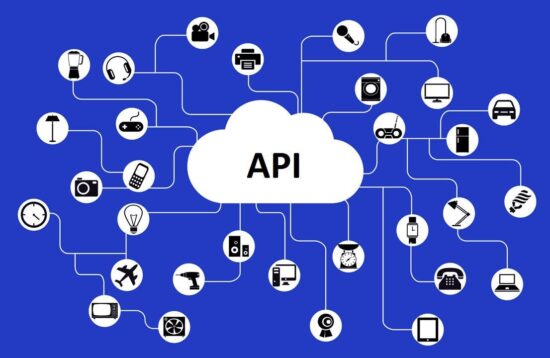
What Is An API?
An API is an application programming interface, which is a set of routines, protocols, and tools for building software applications. APIs are used to develop software applications by providing ready access to data and services from other applications. They allow one application to communicate with another by sending and receiving data in a specific format.
Why Create An Effective API?
- Integration: APIs make it possible for different software systems to communicate with each other, which results in better functionality and user experience. An API allows developers to create applications that can interact with one another, which makes it easier for different systems to work together. This integration can be used by businesses to enhance their products and services, which is why APIs are so popular.
- Efficiency: They enable data sharing and automation, reducing manual tasks and saving time. This can be a huge benefit for businesses, as it allows them to save time and money by automating routine tasks. APIs also make it easier for companies to access data from other systems, which makes it possible for them to streamline their operations.
- Scalability: APIs make it easier to scale your application as it grows, as new features and services can be added via APIs without major overhauls. This makes it easier for companies to grow their business without having to worry about infrastructure issues. As an example, if you have an eCommerce website and want to add an API-based payment service, it’s much easier than trying to build a whole new system from scratch.
- Third-Party Integration: APIs allow third-party developers to extend your application’s capabilities or build complementary products. This can be a huge benefit to your business, as it allows you to tap into new markets and user bases. As an example, if you have an eCommerce business that sells clothing and accessories, adding a payment API will allow third-party developers to create apps for mobile devices that allow users to purchase items on the go.
Step 1: Define Your API’s Purpose
The first step to creating an API is to define its purpose. This can be done by answering the following questions:
- What problem are you trying to solve?
- Who will use this API, and what do they need from it?
- How will this API fit into the overall ecosystem of your product or service?
When you have a clear idea of what you want the API to do, it’s much easier to design and test. It will also make it easier for third-party developers to integrate their apps with yours.
Step 2: Plan Your API

Design Your API
API design is crucial for usability and scalability. If your API is difficult to use, developers won’t want to integrate it into their apps. If it’s too rigid, it could make it too hard for third parties to innovate on top of your platform.
It should be intuitive enough that even if you’ve never used it before, a developer can figure out how to integrate it into their apps. This will help ensure that your platform is as popular with third-party developers as it is with users.
Documentation
Comprehensive documentation is essential for developers who will use your API. It should cover the basics of how to use your API, as well as more advanced topics. Developers will want to know what endpoints you have available and what parameters they can pass in. You should also provide examples of every possible endpoint so that developers don’t have to spend time guessing how it works.
If you have a developer portal, make sure that it’s easy to find and use. The portal should include everything a developer needs in order to start using your API, including documentation and sample code. If there are any additional requirements or steps that developers need to take in order to get started with your platform, make sure they are clearly outlined there as well.
Step 3: Build Your API
The next step is to build your API. This is the most important part of your project, and it can make or break your business.
Choose the Right Technology Stack
The first thing you need to do is choose a technology stack that fits both your budget and skill set. If you’re working with an existing application or framework, then this will be easier; otherwise, selecting an appropriate toolset may prove challenging if you don’t have much experience building APIs.
This is where your research will come into play. You should be able to find a number of different platforms that can help you build your API, including cloud services like Heroku or AWS. There are plenty of open-source frameworks available online that can get you started with little effort.
Implement CRUD Operations
You’ll also need to implement CRUD operations (create/read/update/delete) so that users can interact with their data from outside sources like mobile apps and websites. You should also consider middleware such as authentication and security measures for sensitive information like user passwords and credit card numbers. You can use a simple database like SQLite or MySQL for this, but you’ll need to implement CRUD operations before you can make any use of it.
Middleware And Security
You can use middleware to implement authentication and security measures for sensitive information like user passwords and credit card numbers. Middleware is software that sits between your application and the database itself. It handles requests from users, processes them, and sends the results back to their devices. It’s also possible to implement security measures like two-factor authentication (2FA), which requires users to enter a code sent via text message or app when they log in.
Testing
You should always test your application, even if it’s just a simple proof of concept or MVP. You can do this manually or with automated tests. Manual testing involves walking through the steps of using your app as if you were a user, while automated testing uses scripts to perform specific actions and check that they work correctly. You should test applications on a variety of devices and operating systems, including Android, iOS, web browsers, and even IoT devices like smartwatches.
Step 4: Authentication and Authorization

Authentication is the process of verifying that your user or application is who they say they are, and authorization is determining what actions (or resources) a given user can perform. Both authentication and authorization are critical to securing APIs because they’re often public-facing services with many users.
Decide on the authentication method you planned in the design phase, and implement it. Additionally, consider fine-grained authorization to control what users or applications can do with your API. For example:
- Require all requests to include an API key as part of their headers in order for them to be processed by your app server;
- Limit which data fields can be accessed by each type of user (e.g., only admin accounts have access rights);
- Implement additional security measures. For example, you can create a separate database that stores the API credentials of each user and then update the application code to use this database rather than storing them in plain text.
Step 5: Rate Limiting and Throttling
Rate limit and throttle requests to the API so that you can protect your servers from abuse, prevent overuse, and ensure fair usage. Rate limiting and throttling are two of the most important security measures that you can implement. They help to prevent abuse, ensure fair usage, and protect your servers from being overloaded with requests.
Rate limiting involves using a third-party service like Cloudflare or Fastly to limit the number of requests made per second by an individual IP address. This is a good way to prevent DDoS attacks on your server. Throttling involves implementing code changes within your application so that it processes requests in batches rather than one at a time; this helps reduce CPU load on your servers by spreading out the workload over time.
Step 6: Monitoring and Analytics
Monitoring and analytics tools are essential to understanding how your API is working. You’ll want to set up monitoring tools like Prometheus and Grafana so you can track API usage, performance, and errors. In addition, you’ll want to set up analytics tools like Google Analytics and Mixpanel so you can track user behavior and engagement. Analytics tools can also help you identify and fix bugs faster because they provide detailed information about where the problems are occurring.
Step 7: Version Control
When you’re ready to start using your API, make sure you have a version control system in place. This will allow you to manage the version of your API that is available for consumption by clients and users. If a client wants to use an older version of your API, they can still do so by specifying that version in their URL.
If you want to update the API, you can do so by updating the version number in your code and then pushing it through the version control system. For example, if your API has a version number of 1.0.8, and you want to give users access to that version, they can specify it in their URL by appending /1.0.8 at the end of the URL. This will allow them to use the old version of your API while still giving them access to new features as soon as they’re available.
Step 8: Documentation and Developer Support
You’ve done it! You’ve created an API that’s easy to use and understand, with plenty of documentation and support options. Now all you have to do is wait for the business world to beat a path straight to your door. Additionally, offer developer support through forums, email, or chat to assist users with questions or issues.
This will help you determine whether or not your API is successful, what features need more work, and if there are any bugs that need fixing. If there are bugs, fix them quickly, and release another version of your API. You’ll have to do this several times before you have a stable product that’s ready for use by the masses.
Step 9: Testing and Deployment

Once you have completed your API, it is time to test and deploy it. You will want to ensure that your API works as expected before deploying it into production. To do this, thoroughly test the API in a staging or development environment by running automated tests against it with tools like Postman or Insomnia.
Use CI/CD pipelines for seamless updates so that any code changes made are automatically tested and rolled out when ready. You will want to make sure that your deployment process is automated so that any future changes can be rolled out automatically with minimal effort.
Once the API is fully tested and deployed, it will be time for you to start working on a developer portal. This is where developers can sign up for access to your API and begin building apps with it. You will want to consider including documentation, code samples, tutorials, SDKs, and other developer resources on this site so that developers have everything they need when working with your API.
You can use tools like Ansible and Terraform to automate your deployments. For example, you could create a playbook that installs all dependencies and then deploys your API using a single command. If you are using Docker, you can use Docker Compose or Kubernetes for deployment.
Step 10: Scaling and Maintenance
Scale your API horizontally by adding more servers or using load balancers to distribute requests evenly. Monitor your API to ensure it’s running smoothly. Use monitoring tools like Nagios and NewRelic to keep an eye on your servers. You can also use autoscaling with services like AWS Auto Scaling Groups and Google Cloud Load Balancers. If you need help with either of these tasks, consider using a managed service like Cloudflare Workers.
Regularly monitor your API’s performance and health in the production environment. Implement automated alerts to detect and address issues promptly. Use tools like Pingdom and APM solutions to check your API’s performance. Monitoring can help you identify issues and fix them before they affect your users.
The best way to ensure that your API is performing well is by testing it regularly. Test every major change before deploying it live, and run tests frequently after deployment so that you can quickly identify problems with the new code or infrastructure changes.
Conclusion
As you can see, creating an API is a complex process that requires a lot of planning and thought. But the benefits of doing so are worth it: an effective API can help you build better products, connect with new audiences and partners, streamline internal processes at your company, and more! The key takeaway here is that if you want to create an effective API–and who wouldn’t?–then make sure that all aspects of its development are well thought out before moving forward with development work on your end.